
SURF’s UP DUDE!
Load up the cooler and get your best board ready! It’s time to drive down to the beach and catch some waves!
This new Lego Creator set represents the good times, when surfing was cool, the beach party lifestyle was hip, and rolling around in your bug was all the freedom you needed.
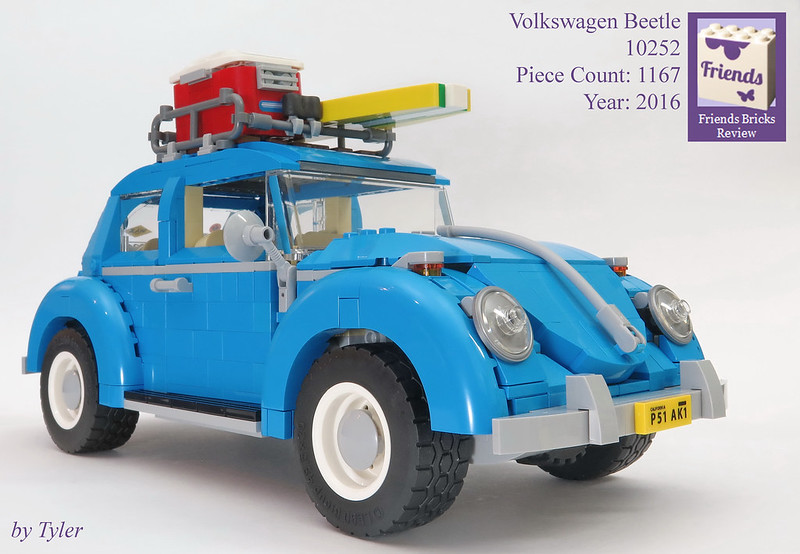
This is not a FRIENDS SET, but just look at all those Dark Azure bricks!!!! Its so pretty... so we just had to review it!
This set was provided by the AFOL Relations & Programs team (AR&P) of The LEGO Group for the purpose of sharing set details with fans.
Opinions provided here solely reflect those of our reviewer.
Photographs are property of Friends Bricks and are not directed by TLG in any fashion.
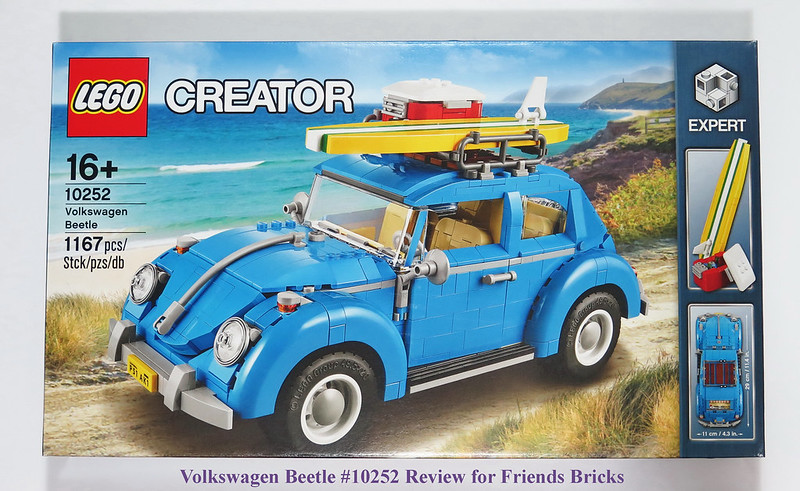
Front of the Box
The box art on the front of this new Creator set shows the Volkswagen Beetle cruising down a sandy road towards the ocean. The car has a roof rack sporting a cooler and surf board. There is also top view of the car showing the roof rack detail and the models' real dimensions.
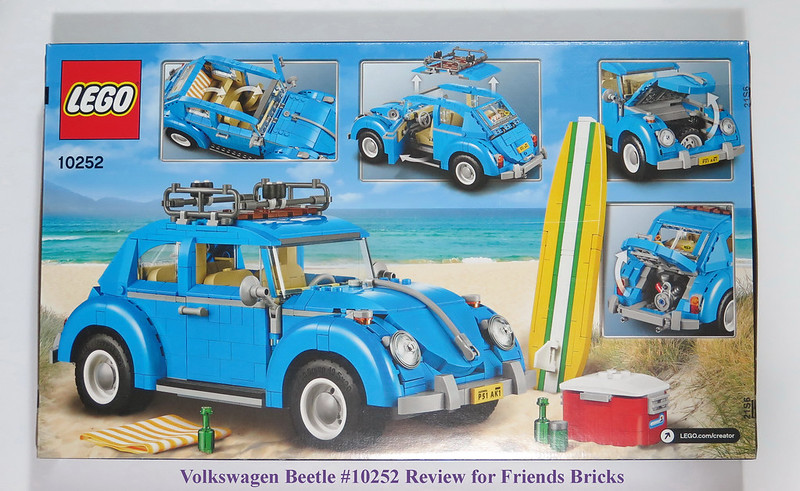
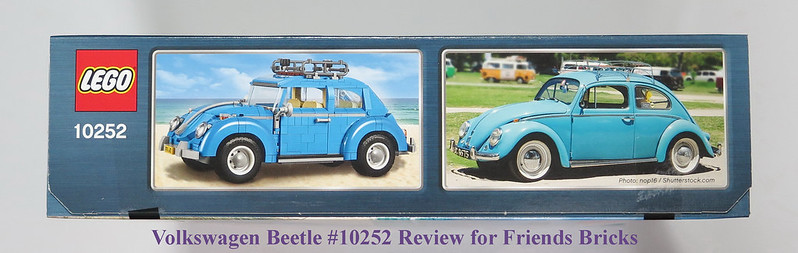
Back of the Box
The back of the box continues the theme from the front, showing the Volkswagen Beetle parked at the beach with the blanket, cooler, and surf board ready for use. The inset photos show many details highlighting important play features and the high level of detail provided throughout.
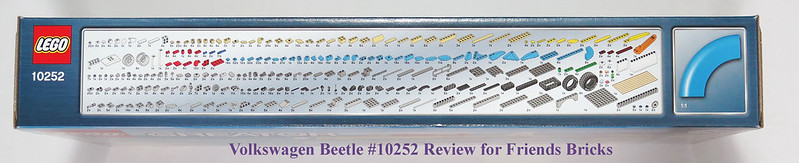
Long Side of Box
I very much appreciate that the Creator series Lego sets all include a parts list right on the box! Seeing what parts are in the box is useful information that I wish Lego would include on the boxes of all Lego Sets.
This is an "Expert" series Creator set. This one does not include any alternative builds, like many of the smaller Creator sets. However, this one is still very much focused on a fun and fulfilling building experience, and it demonstrates many interesting techniques along the way. You may be surprised at how some areas are built and you could learn something new while building this car. At the very least may be inspired to try some of these techniques in you own creations.
Short Side of Box
This side of the box also has a photo comparing this Lego Model to an actual 1960’s Volkswagen Beetle. The real car is also azure blue, with white rims, and a roof rack. Its an impressive comparison, showing how closely they match in shape and external features.
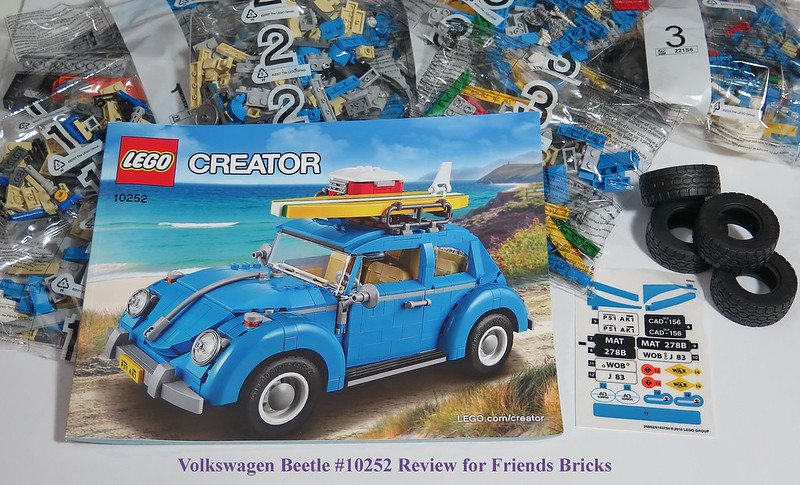
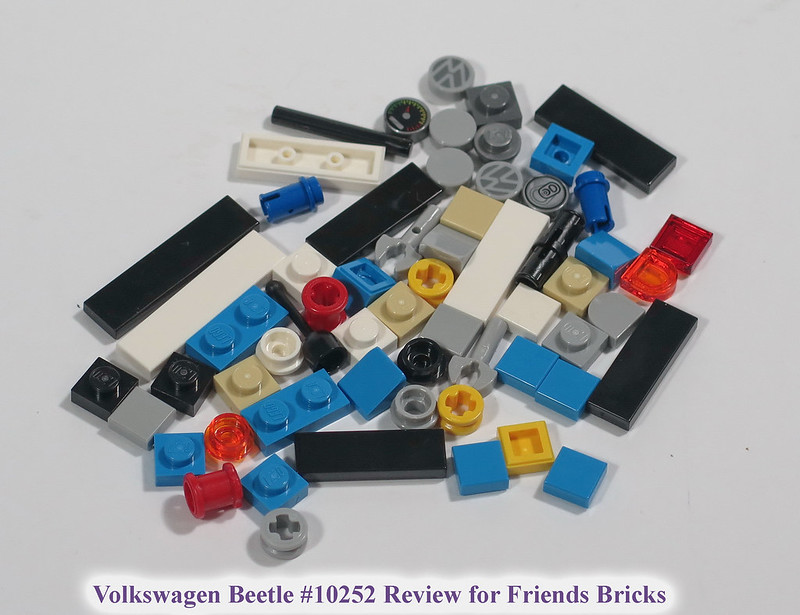
The Box Contents
The box contains many small bags and three large bags, all bags are numbered from 1 through 3. It also contains 4 loose tires, a sticker sheet, and a fairly thick instruction book. There is a fifth tire in one of the sealed bags.
There is also a parts list at back of the instruction book:
(I added blue arrows pointing to the parts that I personally found the most interesting)
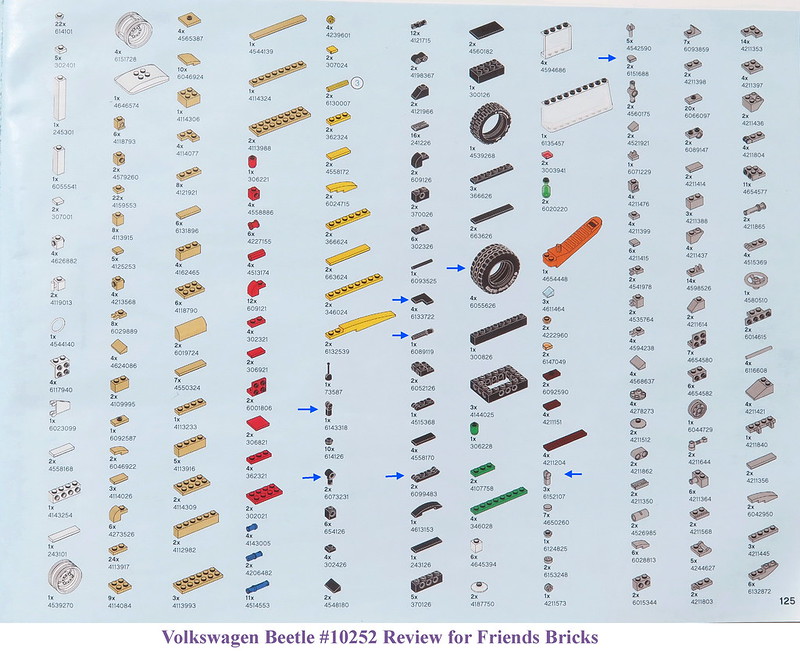
THE PARTS LIST
There are so many dark azure parts in this set, which just makes me so very happy! The 6x6x2 round brick is a new mold, and their are eight included in this set. These are used on the cars' fenders, and really make the curves pop. Many of the dark azure parts in this set have never been released in this color before, and it is always useful to get existing parts in new colors.
There are also lots of other useful parts included that were introduced just this year (2016), these are starting to become available in more and more sets now, which is great to see.
When I look at this parts list I am impressed by the large number of very useful parts included. I don't think I would take this car apart after building it, but if I was to buy another set, this would be a really awesome parts pack!
Lego promotion pages for some other Creator sets...
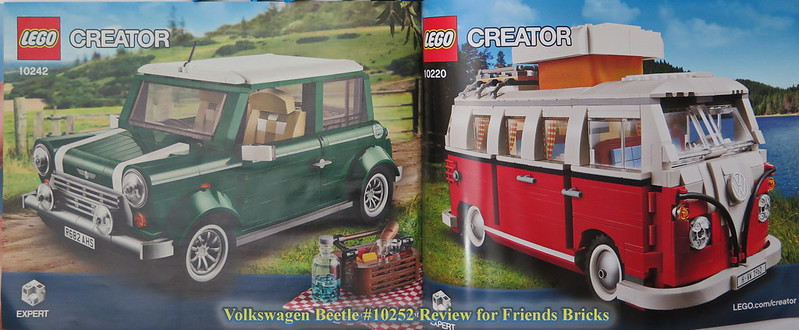
Also near the back of the book are two pages highlighting two additional Expert Creator sets, including 10242 Mini Cooper, and 10220 Volkswagen T1 Camper Van. I bet many of you already have both of these sets.
The instructions are typical of all Lego sets, being well organized with each step picturing the parts needed and showing how to connect them together.
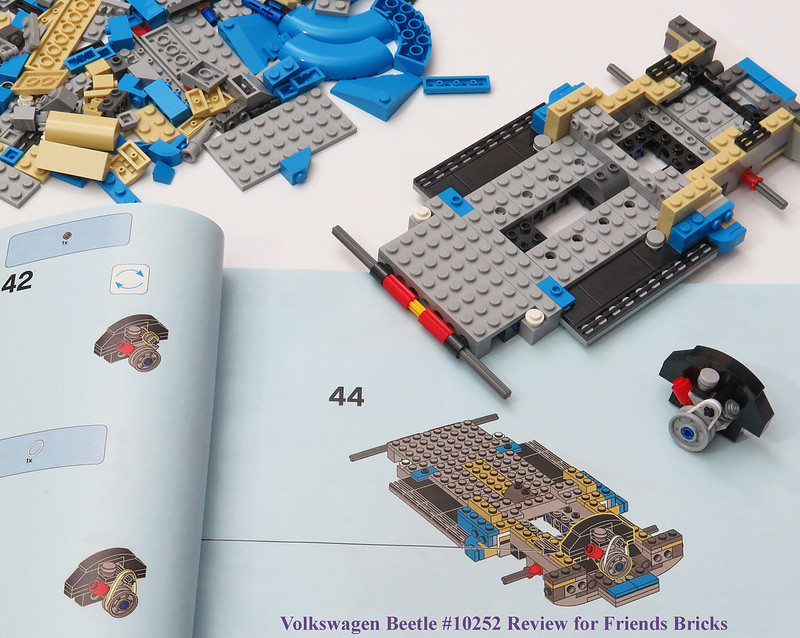
Instruction Detail...
I especially like that this set has some smaller car component related builds, like the Engine, which uses an interesting technique to angle everything just right.
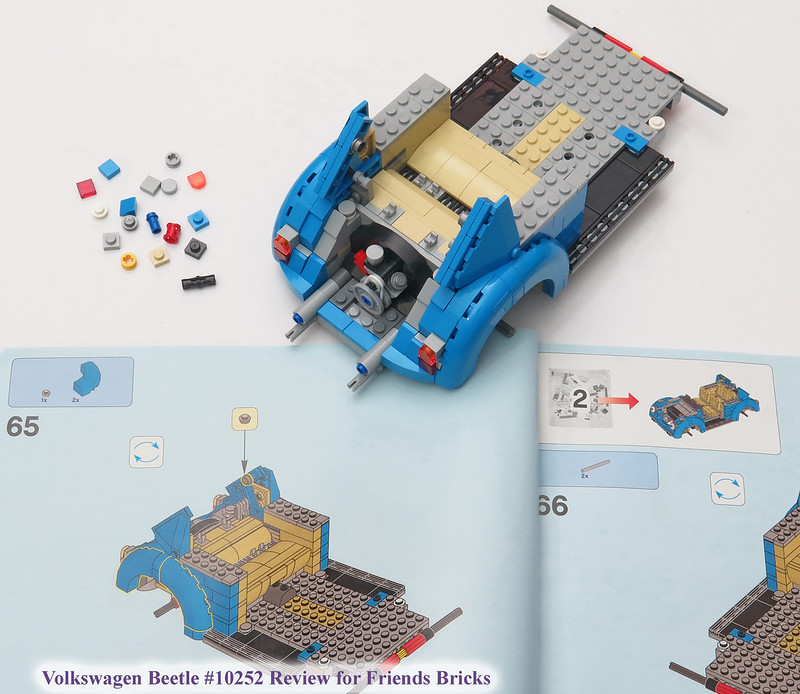
Section One Complete.
At the end of the first section, the vehicles base and rear of the car is mostly complete. The build experience for this section was fun and included an unexpected approach for building the small storage area which is behind the rear seat. This part is built sideways and fits perfectly into the normal studs up area between the engine compartment and rear seat cushion. It is intentionally built this way to provide connections which are used later to attach the trunk and angled rear window.
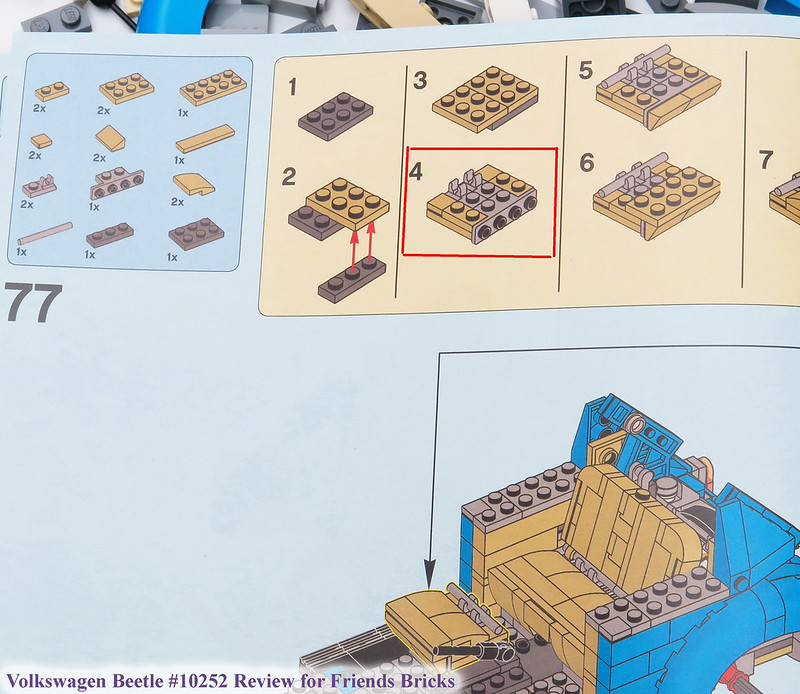
Front Seat Cushion Step
In the second part of the instructions there is a few pages where you build the front seats. In one step (highlighted above), I did get a little confused. While there is nothing specifically wrong with the instructions provided, it did take awhile for me to figure out what needed to be done to complete this step. The problem is that it requires 7 parts, completely covering the ones shown in the previous step, effectively creating a new layer. It took me a minute to realize this. I think breaking this into two separate steps would have made it much easier to determine what needs to be done. I figured it out after some thought, but it makes me wonder how many other builders run into these types of problems when following the Lego instructions.
Section Two Complete!
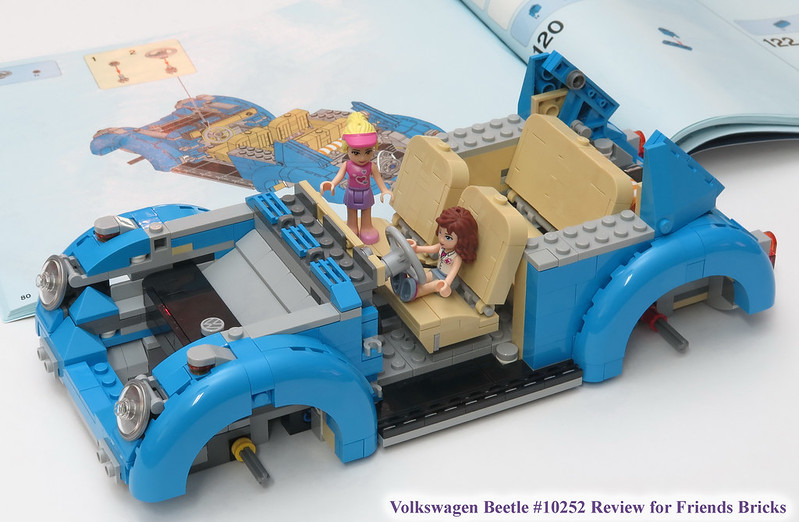
After completing this section Stephanie and Olivia came to check out the build process so far. While impressed with the detailed interior and pretty paint color, they are wondering if they will be able to drive this beetle back to HeartLake City when its finished!
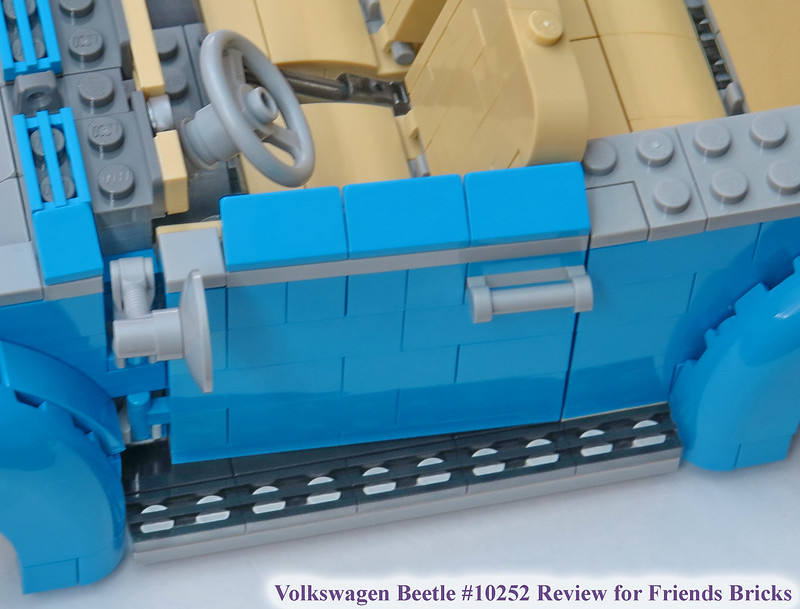
Door Detail
In the last section of the built, lots of neat little details start to appear, like this subtle but perfect ½ stud offset from the front to the back of the door, tapering the car body. Its one of those small, but impressive details, that you may not notice when first considering the set, but cannot un-see after becoming aware of it. I have to give major Kudos’ to the Lego designer (Mike Psiaki) for including lots of small interesting details in this set.
View from Front
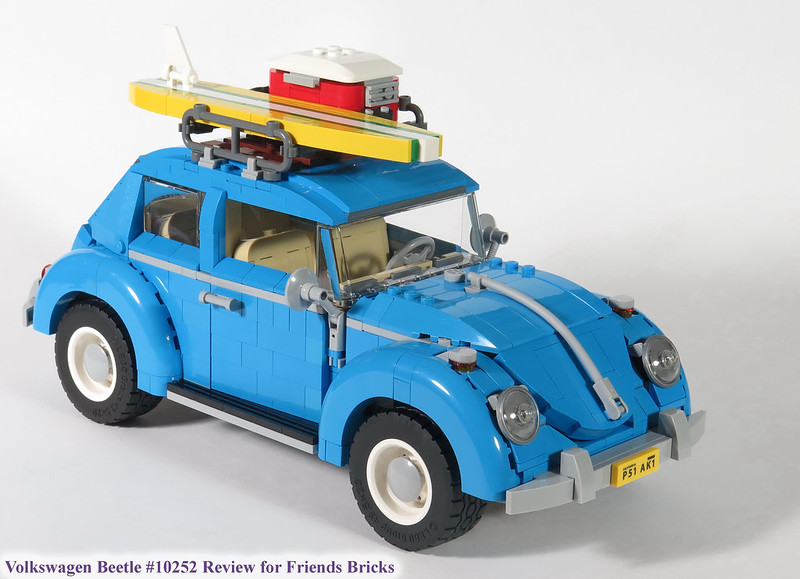
Once all the building steps were completed, the final model was even more impressive than I had anticipated it would be.
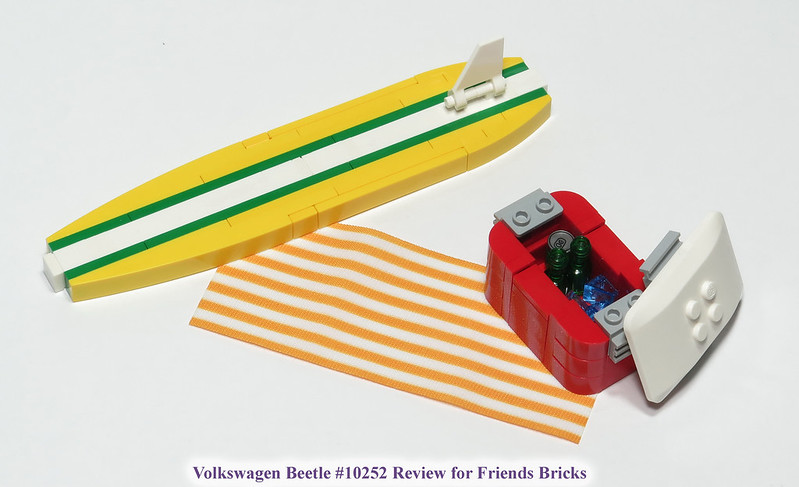
Surfboard and Cooler
The surfboard and cooler and nicely built, with colors that contrast in a pleasing way against the car. The cooler includes a pop can, two bottles, and some ice. The picnic blanket is a printed fabric, the orange stripes fit right in with these other accessories.
Extra Parts:
These extra parts were included but not needed in the build. You will have a slightly different set of parts if you choose a different license plate. The tiles pictured allow you to apply a different license plate sticker, depending on the country you wish the car to represent. This batch of extras is actually quite nice, better than most, including lots of tiles, some with prints, and a handful of small dark azure plates and some other useful small parts.
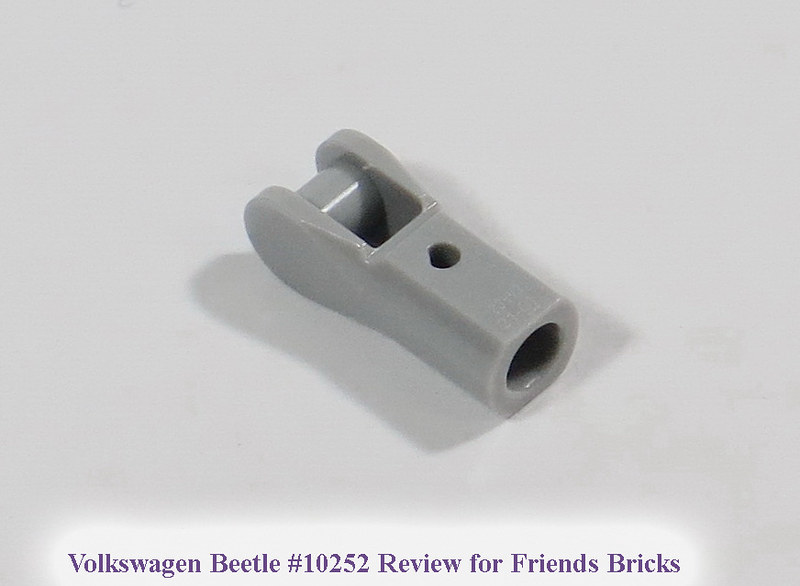
Example of new 2016 Part and how it's used in this model
As a MOC builder I am always interested in figuring out how to use new parts in interesting ways. This model does just that with many of them. I think the new 2016 “Bar Holder with Handle” is a great example of Nice Parts Usage (NPU) in this model. In this set the part is supplied in two colors! One in Black, which has been seen on other 2016 sets this year, and three in light blue gray! This is the first time I’ve seen this part in light blue gray.
In this photo a black Bar Holder is used as the base of the car’s Emergency Brake. A simple but effective use.
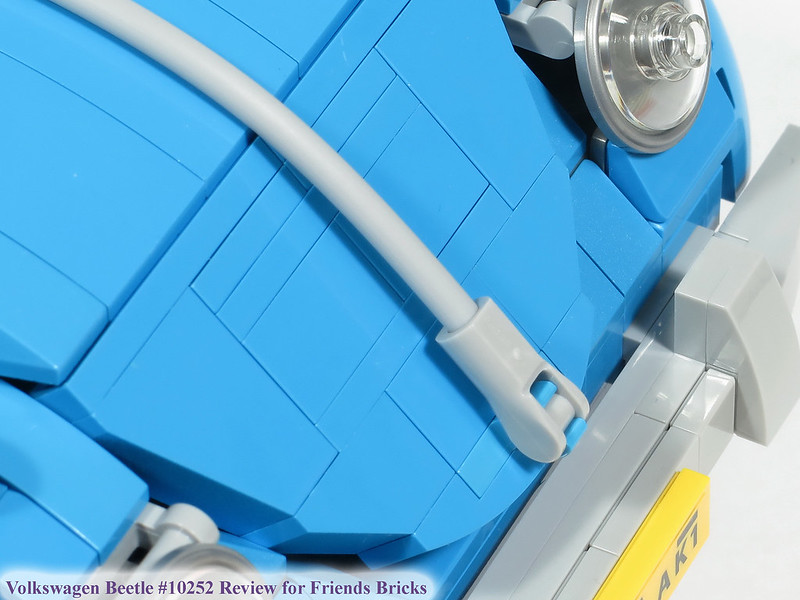
In this photo the Bar Holder in light blue gray is used with a hose to represent the hood release handle and hood trim detail found on the actual car.
Seeing this new part used with a hose is sure to inspire lots of great ideas.

In this last photo for this part, its connected onto a 1x1 modified brick with vertical bar, and then clipped to the arm of the side mirror, enabling it to angle outwards!
This is another example of NPU!
BELOW ARE SOME ADDITIONAL PHOTOS OF THE COMPLETED MODEL
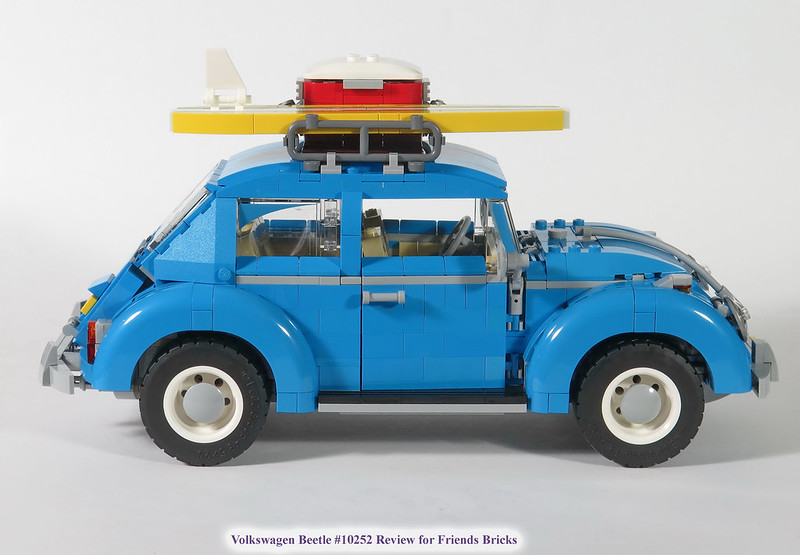
Side View
The model looks good from most angles.
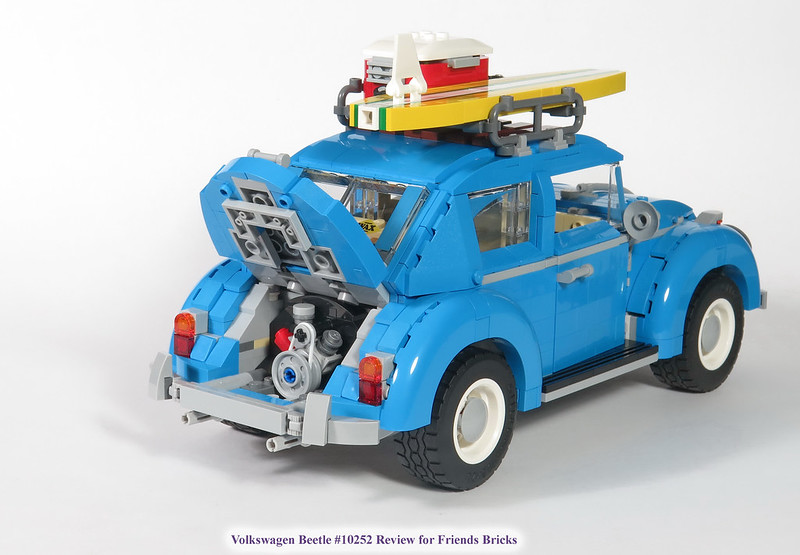
Rear View
The Trunk opens to show the Air-Cooled Engine. Also, the new 1x1 tile with round end in transparent orange is used perfectly here as the rear blinker lights!

Front of Car
The hood opens to show the gas tank and spare tire. The tire can be removed, and like many real cars, is a narrower spare version of the original tire. The filler cap has a printed VW Logo on it. There is another one on top of the hood.
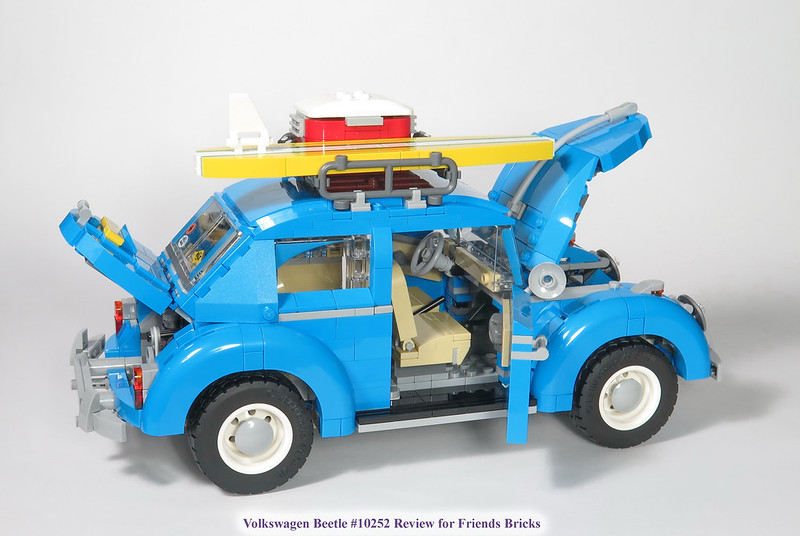
Side View – Doors Open
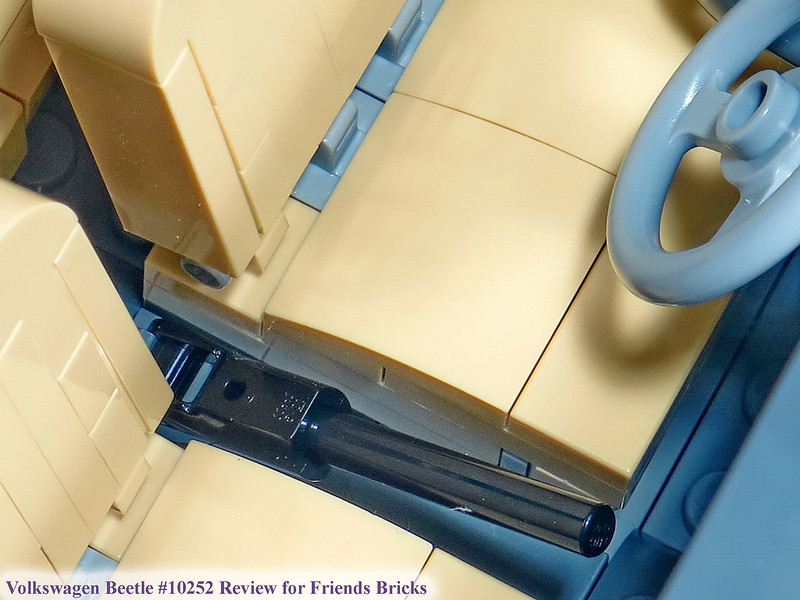
From this view you can see some of the interior detailing, including the tilt steering wheel, tilt seats, parking brake, gear shift lever, and suggested glove box. There is also a printed tile in the dash to represent the speedometer, and some interior door details. The seats, dash, and inner door panels are all done in tan bricks.
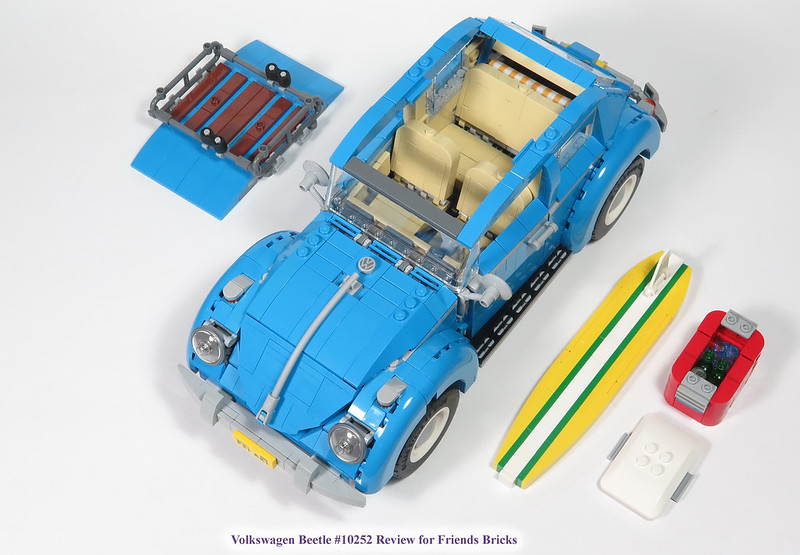
View from the top
The roof can be easily removed, allowing you to access all of the great interior details. The seats (front and back) can be tilted forward. In this image you can see the beach blanket rolled up and placed in the storage area behind the rear seat.
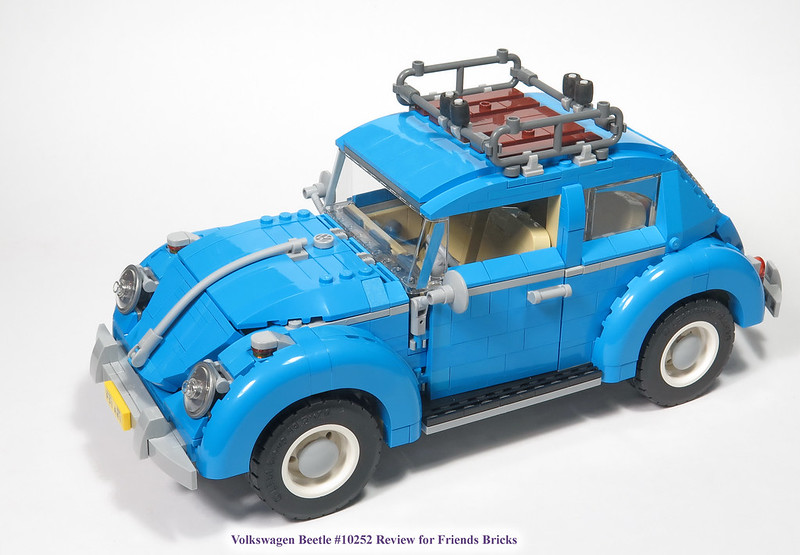
View from above
This angle shows off the roof rack detail. The wooden planks look great. The Lego designer included the two black rubber connectors to help hold the cooler in place and stop the surfboard from sliding around. However, they aren’t really needed for a static model, and I think it looks better without them.
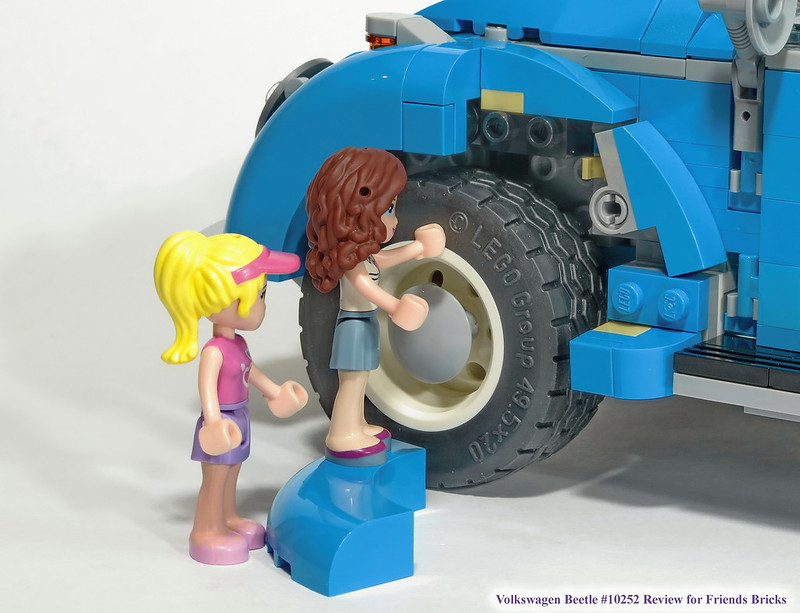
The BFF's are back for a final inspection.
Removing a fender allows them to see just how the fenders were connected and how the rounded fender detail was continued from the top down to the front door.
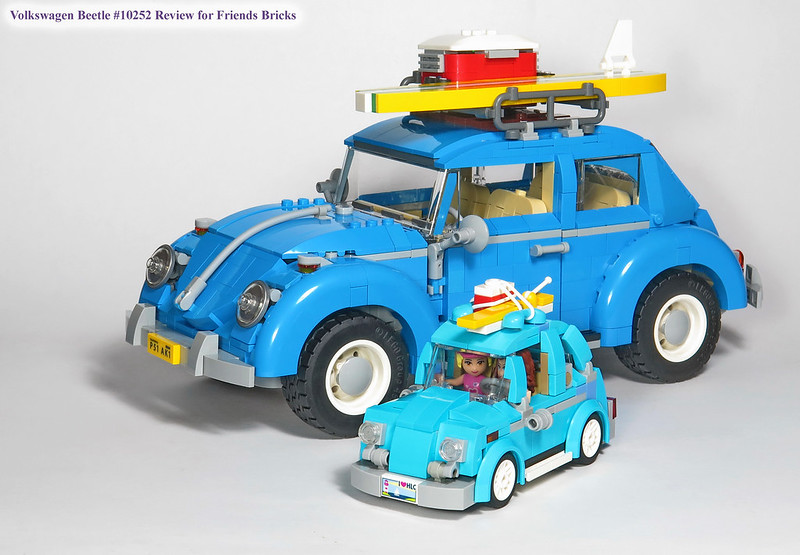
Comparing the scale of 10252 versus a minidoll scaled MOC of the Beetle.
In case you were wondering, these two friends will be taking their own VW bug back home to HeartLake City, leaving this Creator Set here for your viewing pleasure.
The minidoll scaled VW Beetle was built by me, while waiting for the actual set to arrive in the mail for this official review. Additional photos of the smaller VW are available to see here:
www.flickr.com/photos/tylersky/albums/72157671197487266
No comments:
Post a Comment
Note: Only a member of this blog may post a comment.